
Food
The Perfect Calzone Dough Recipe: Mastering the Italian Classic at Home

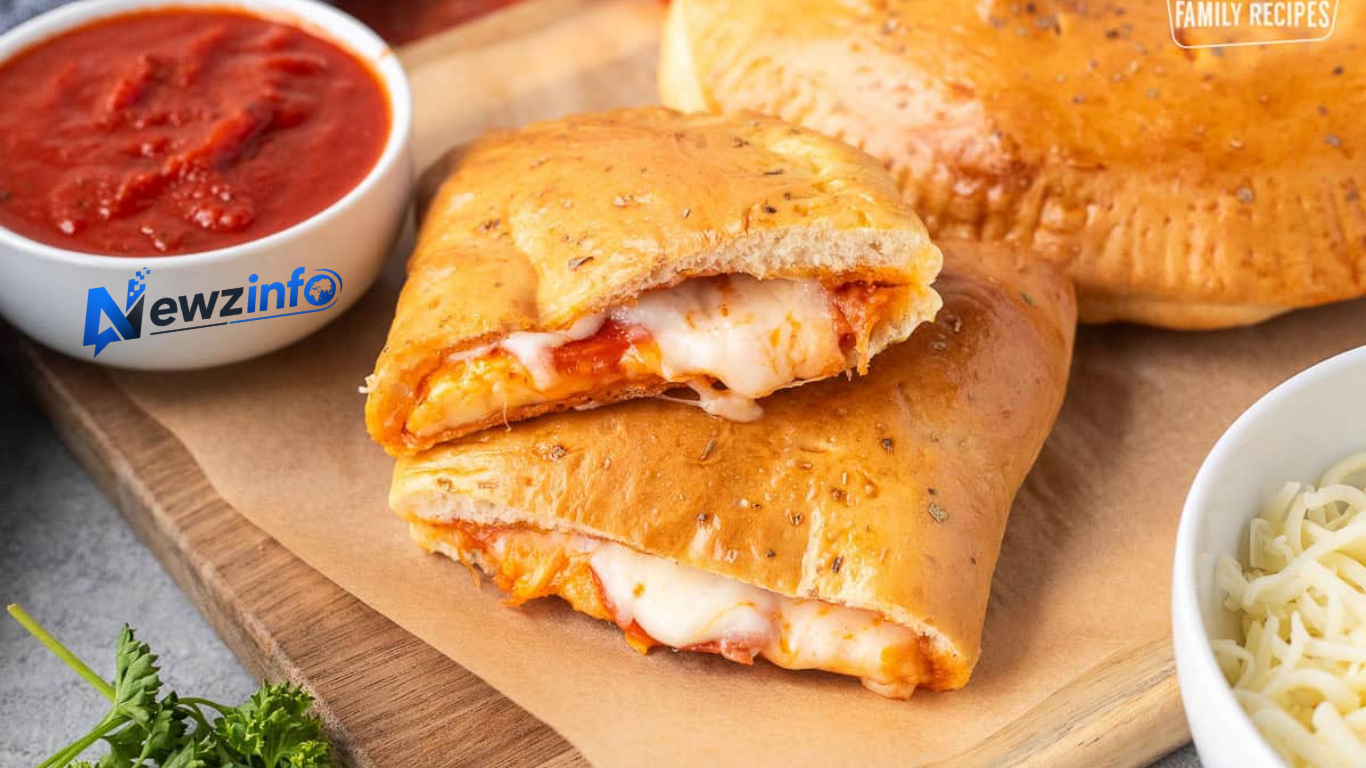
Calzone dough recipe enthusiasts know the joy of that first bite: a golden, crisp exterior giving way to a pillowy interior enveloping rich, molten fillings. Whether you’re a seasoned home baker or new to Italian street food, crafting an authentic calzone starts with the dough. This folded pizza pocket, born in the bustling streets of Naples, offers portability and flavour in one satisfying package.
In this comprehensive guide, we explore everything you need to create exceptional calzone dough at home. From its humble origins to pro tips for perfect results, you’ll discover why this versatile dough deserves a place in your kitchen repertoire. With simple ingredients and a bit of patience for fermentation, you can achieve bakery-quality calzones that rival those from Naples.
The Origins and Appeal of Calzone
Calzone, meaning “trouser leg” or “stocking” in Italian, emerged in 18th-century Naples as convenient street food for workers. Unlike open-faced pizza, which required sitting down with utensils, the calzone was designed for eating on the go—folded and sealed to contain its fillings without mess.
Traditional versions featured ricotta, salami or ham, mozzarella, and sometimes anchovies or olives, baked or occasionally fried. Over time, it crossed oceans with Italian immigrants, evolving in American pizzerias into larger, heartier portions. Today, the calzone remains a beloved comfort food, prized for its textural contrast: a crunchy crust protecting a steamy, cheesy interior.
The calzone dough recipe is remarkably similar to pizza dough but optimised for folding and containment. A well-made dough balances strength and tenderness, allowing it to stretch thinly yet hold substantial fillings without tearing or becoming soggy.
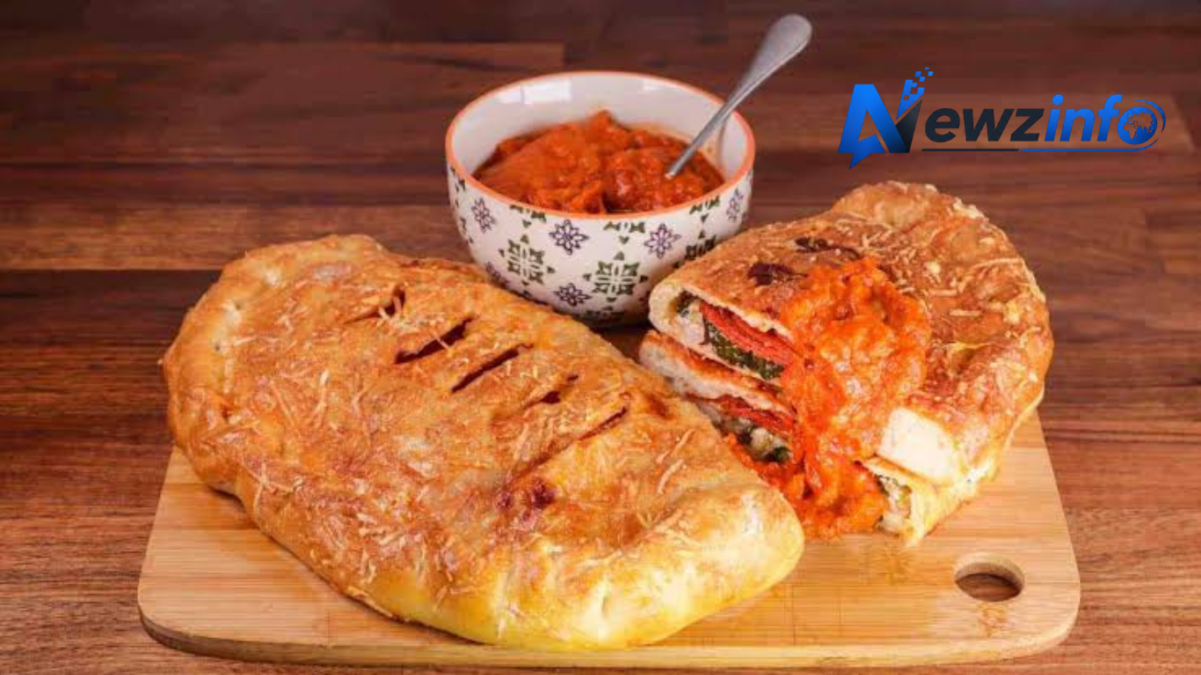
Understanding Calzone Dough: Key Ingredients and Principles
At its core, an authentic calzone dough recipe relies on just a few high-quality ingredients: flour, water, yeast (or sourdough), salt, and a touch of olive oil. The magic lies in the ratios, technique, and fermentation time.
Flour forms the foundation. Italian Tipo 00 flour, with its fine grind and moderate protein content (around 11-13%), yields the most tender yet structured results. Bread flour or strong all-purpose flour works well as a substitute in home kitchens.
Hydration typically ranges from 55-65% for calzone dough—slightly lower than many pizza doughs to provide stability for the pocket. Too much water risks a soggy interior; too little yields a tough crust.
Yeast can be fresh, active dry, or instant. For deeper flavour, many prefer a long, slow fermentation, often with minimal yeast and cold proofing in the fridge. Sourdough versions add tangy complexity.
Salt enhances flavour and strengthens gluten, while olive oil contributes tenderness and subtle fruitiness. Avoid overloading with fat, as it can inhibit rise.
Classic Calzone Dough Recipe (Makes 4-6 Calzones)
Ingredients:
- 500g Tipo 00 or strong white flour (plus extra for dusting)
- 300ml lukewarm water (adjust for 60% hydration)
- 10-12g fresh yeast or 3-4g active dry yeast
- 10g fine sea salt
- 10-15ml extra virgin olive oil
Method:
- Dissolve the yeast in a portion of the warm water (around 100ml). Let it stand for 5-10 minutes until frothy.
- In a large bowl or on a clean work surface, mound the flour and create a well in the centre. Add the salt to the flour (not directly to the yeast), then pour in the yeast mixture, remaining water, and olive oil.
- Gradually incorporate the flour into the liquids, mixing with your hands until a shaggy dough forms. Knead on a lightly floured surface for 8-12 minutes until smooth, elastic, and slightly tacky but not sticky. The windowpane test is useful here: stretch a small piece thinly without tearing.
- Place the dough in a lightly oiled bowl, cover with a damp cloth or cling film, and let it rise at room temperature until doubled (1.5-3 hours, depending on temperature). For superior flavour and digestibility, opt for a cold fermentation: after initial kneading, refrigerate for 18-48 hours.
- Divide the rested dough into 4-6 equal portions (roughly 200-250g each for individual calzones). Shape into tight balls and let them rest, covered, for another 30-60 minutes at room temperature. This relaxes the gluten for easier stretching.
Shaping, Filling, and Baking Your Calzone
On a lightly floured surface, gently stretch or roll each ball into a circle about 20-25cm in diameter. Keep the edges slightly thicker for a good seal.
Place fillings on one half: traditional combinations include drained ricotta, diced low-moisture mozzarella (fior di latte), salami or ham, grated Parmigiano, black pepper, and a few basil leaves. Keep fillings moderate—overstuffing leads to leaks. Avoid excess wet sauce inside; serve marinara on the side for dipping.
Fold the empty half over the filling to form a half-moon. Press and crimp the edges firmly (or use a fork, though traditionalists prefer a rope-like seal). Prick the top a few times with a fork to vent steam.
Preheat your oven to 220-250°C (fan) or as hot as it will go, ideally with a pizza stone or steel. Brush the calzone with olive oil or egg wash for shine and colour. Bake for 15-25 minutes until deeply golden and crisp. Let rest for 5-10 minutes before serving—the interior will be very hot.
Pro Tips for Success:
- Drain ricotta thoroughly to prevent sogginess.
- Use low-moisture cheeses for fillings.
- Experiment with hydration: start at 60% and adjust based on your flour.
- For fried calzone (calzoni fritti), use a sturdier dough and fry at 160-170°C until golden.
Variations on the Classic Calzone Dough Recipe
While the Neapolitan style remains king, calzone dough adapts beautifully. Add herbs or garlic powder to the dough for aromatic twists. For a heartier version, incorporate a small percentage of whole wheat or semolina flour.
Sourdough calzone dough, using a levain, rewards with complex nutty notes and excellent keeping qualities. Regional Italian variations include Pugliese styles with more oil for tenderness or Sicilian versions sometimes enriched with lard or sugar.
Sweet calzones exist too, filled with Nutella, ricotta, or fruit, though the savoury original dominates.
Common Challenges and Troubleshooting
Dough tearing? It may be under-rested or over-hydrated. Sticky dough? Add flour gradually during kneading. Poor rise? Check yeast freshness and water temperature (too hot kills yeast; too cold slows it).
For beginners, store-bought pizza dough serves as a convenient shortcut, though homemade offers unmatched flavour and texture control.
Pairings and Serving Suggestions
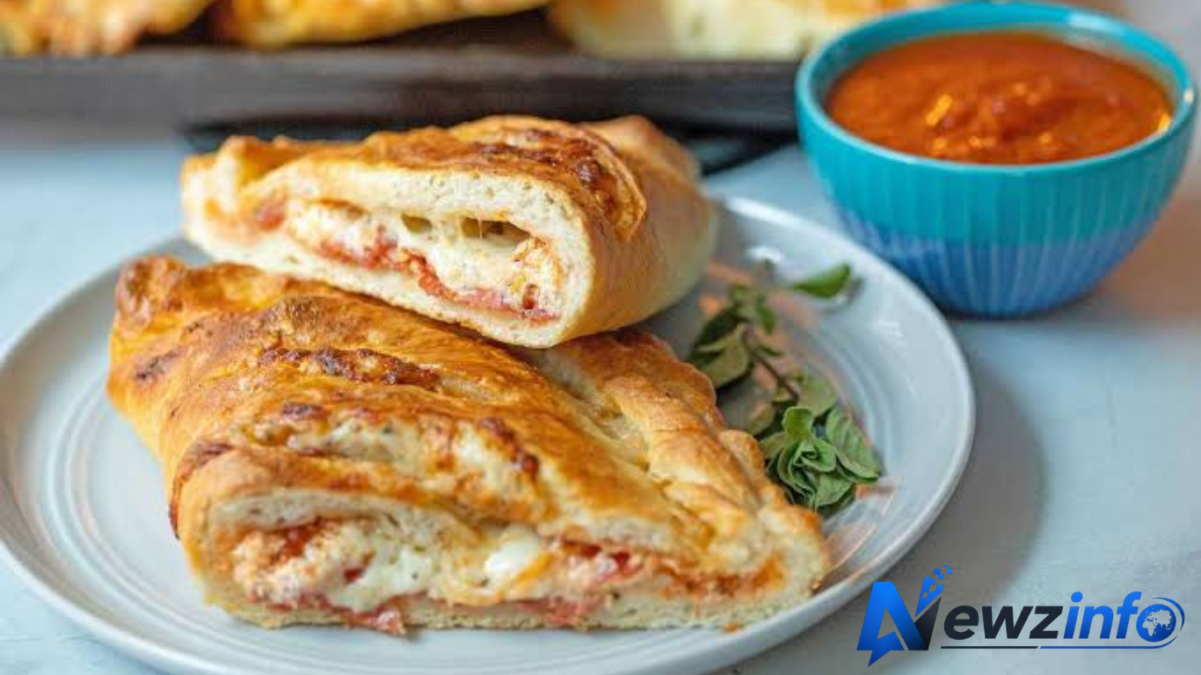
Serve calzones hot with a simple marinara for dipping, a crisp green salad, or antipasti. A medium-bodied Italian red like Chianti or a cold beer complements the richness perfectly. They make excellent leftovers—reheat in a hot oven to restore crispness.
Quick Facts on Calzone
| Detail | Information |
| Origin | Naples, Italy, 18th century |
| Meaning | “Trouser leg” or “stocking” |
| Key Ingredients | Flour, water, yeast, salt, olive oil |
| Typical Hydration | 55-65% |
| Cooking Methods | Baked or fried |
| Popular Fillings | Ricotta, mozzarella, salami |
The Enduring Charm of Homemade Calzone
The calzone dough recipe embodies Italian culinary wisdom: respect for simple ingredients, patience with fermentation, and clever technique. Whether recreating a taste of Naples or inventing new fillings, mastering this dough opens doors to endless creativity in your kitchen.
Conclusion
What do you find most interesting about calzone dough recipe? Share your thoughts, favourite fillings, or baking successes in the comments below. If you enjoyed this article, consider sharing it with others who appreciate authentic Italian recipes and the joys of homemade comfort food.
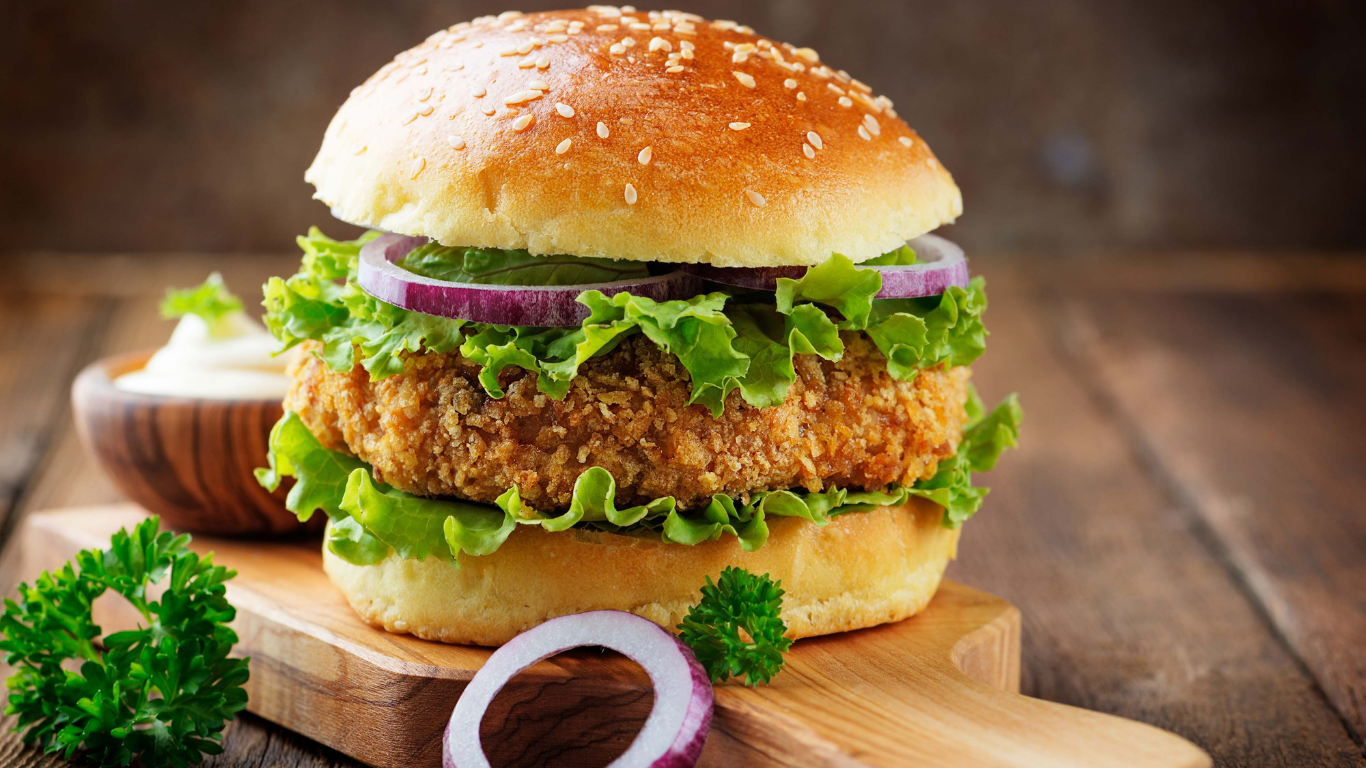
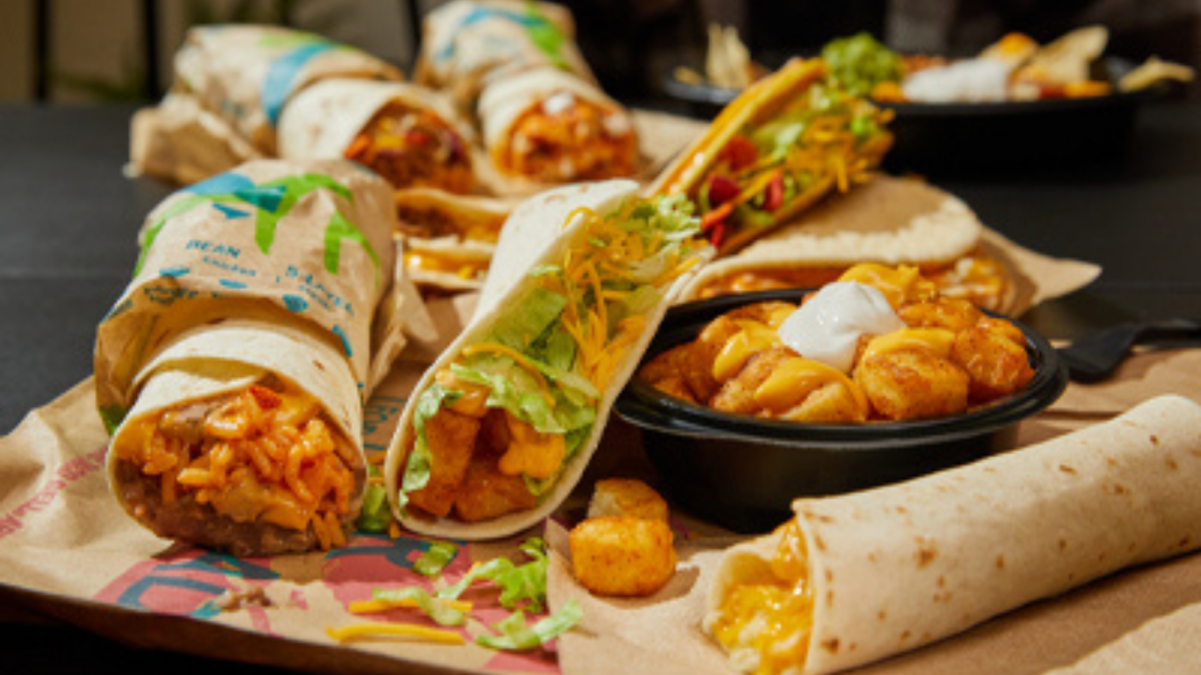
Searching for fast food near me is one of the most common impulses of modern life. Whether you are rushing between meetings, feeding the family after a long day, or simply craving something familiar and filling, that quick search delivers options almost instantly. In Britain the phrase captures more than convenience. It reflects a national relationship with affordable, speedy meals that has evolved over decades.
From high-street bakeries to global burger giants, the landscape of fast food near me is rich, competitive and deeply woven into everyday British culture. Readers keep returning to the topic because the options keep changing, new health-conscious choices appear, and local favourites continue to hold their own against international brands. This feature explores how the sector grew, what dominates searches today, and how to navigate the choices wisely.
Early Life and Background
Fast food as we know it did not arrive fully formed. Its roots in Britain stretch back further than many realise. Post-war dining habits shifted as people sought affordable meals outside the home. In the 1950s the Berni Inn chain introduced many Britons to casual restaurant dining, while Wimpy opened its first London branch in 1954 and offered burgers served with cutlery and china plates.
The true acceleration came with American imports. KFC opened its first UK restaurant in Preston, Lancashire, in 1965. McDonald’s followed in 1974 with its debut site in Woolwich, south-east London. Burger King arrived two years later. These openings marked a turning point. Suddenly the idea of grabbing a standardised, quickly prepared meal became mainstream.
Homegrown players developed in parallel. Greggs began in Newcastle in 1939 as a bakery delivering ingredients by bicycle. It expanded into high-street shops selling sausage rolls, sandwiches and later a wide range of on-the-go food. By the late twentieth century the combination of international chains and British institutions had created a dense network of options available almost everywhere.
Education in the modern sense was unnecessary; the market itself taught consumers what to expect. Early interests centred on speed, consistency and value. Those principles still drive people typing “fast food near me” into their phones today.
Career and Rise to Fame
The breakthrough came in the 1970s and 1980s as the big brands scaled rapidly. McDonald’s, KFC and Burger King spread across the country, bringing drive-thrus, standardised menus and heavy advertising. Subway and others added variety. At the same time Greggs grew into the chain with the largest number of physical locations in the UK, surpassing many global names by sheer density on the high street.
Major milestones included the expansion of delivery services, the rise of app-based ordering, and the adaptation of menus to local tastes. Greggs’ vegan sausage roll became a cultural talking point. Nando’s peri-peri chicken embedded itself in British social life. Pret A Manger carved a niche with fresher, sandwich-led offerings.
Recognition arrived through sheer ubiquity and public affection. Polls have repeatedly shown Greggs ranking among the most positively viewed dining brands in the UK, often ahead of McDonald’s. Collaborations with fashion retailers, limited-edition menu items and celebrity endorsements further raised profiles. The public reputation of the sector is mixed—praised for accessibility and convenience, scrutinised for nutritional content—but the demand remains constant.
Personal Challenges or Turning Points
The industry has faced well-documented pressures. Rising concerns about health and obesity prompted menu reformulations, clearer calorie labelling and the introduction of lighter or plant-based options. Economic pressures, including higher ingredient and energy costs, tested operators. The pandemic accelerated delivery and contactless service while forcing temporary closures.
Some chains experienced setbacks. Certain American brands struggled to maintain UK footholds or had to relaunch. Independent and regional chicken shops faced competition from both global players and new entrants such as Popeyes. Resilience appeared in adaptation: Greggs continued opening hundreds of new sites, McDonald’s refined its breakfast and value offerings, and many operators invested in app loyalty schemes and healthier ranges.
These challenges produced growth rather than collapse. Consumers still search for fast food near me because the core proposition—speed, familiarity and reasonable price—survived every test.
Personal Life
Public information about the sector focuses on collective rather than individual stories. Confirmed patterns show that fast food forms part of family routines, student life, late-night journeys and workday lunches. Chains publish statements on sourcing, sustainability and community programmes. Greggs runs a foundation supporting education and food poverty initiatives. Larger operators report on packaging reduction and animal welfare standards.
Relationships between brands and customers are transactional yet enduring. People form habits around particular locations or menu items. Marriage of convenience and tradition is evident every time a family heads to the same familiar counter. No reliable public data supports speculative claims about private lives of executives or specific outlets; the focus remains on the service delivered to the public.
Later Career and Current Activities
Today the market continues to evolve. Greggs leads by store count with well over 2,500 locations and ambitions to grow further. McDonald’s maintains strong brand recognition and a large estate. KFC holds significant share in the chicken category while newer American chicken brands expand. Domino’s and other delivery-focused operators thrive alongside traditional walk-in sites.
Public appearances take the form of high-profile store openings, menu launches and charity partnerships. Business ventures include drive-thru expansion, ghost kitchens and collaborations with retailers. Advocacy centres on responsible marketing, waste reduction and employment opportunities for young people. Digital tools now dominate discovery: maps, reviews and real-time opening hours shape every “fast food near me” search.
Quick Bio
| Detail | Information |
| Full Name | Fast food sector in the UK |
| Date of Birth | Roots in 1930s–1950s; major growth from 1960s |
| Place of Birth | United Kingdom (with international influences) |
| Nationality | British-led with global chains |
| Profession | Quick-service restaurants and takeaways |
| Years Active | 1950s–present |
| Known For | Convenience, value, high-street presence |
| Estimated Net Worth | Collective multi-billion-pound market |
Legacy and Lasting Impact
The lasting importance of fast food near me lies in its role as a reliable, democratic option. It has shaped high streets, employment patterns and eating habits for generations. Influence extends to menu innovation, technology adoption and the balancing act between speed and quality. Public perception remains pragmatic: many people use these outlets regularly while remaining aware of nutritional trade-offs.
Lessons include the value of consistency, the power of local adaptation, and the need to respond to changing consumer expectations around health and sustainability. The sector’s ability to remain relevant through economic and social shifts explains why the search query endures.
Conclusion
From post-war beginnings to today’s dense network of options, the story of fast food near me is one of practical evolution. What began with a handful of pioneering sites has become an everyday resource for millions. The best experiences still combine speed with decent quality, and the strongest brands continue to listen to their customers.
Must Read: Yankees vs Mets: Intense Subway Series Rivalry Heats Up with September Showdown Looming

Omakase sits at the heart of refined Japanese dining. The word itself means “I’ll leave it up to you,” a quiet invitation for the diner to place complete trust in the chef. Rather than scanning a menu and choosing dishes, guests surrender the evening’s choices so that the kitchen can respond to the day’s finest ingredients, the season, and the subtle cues of those seated at the counter.
This approach has captivated food lovers far beyond Japan. It offers more than a sequence of plates; it creates a living conversation between maker and eater. In an age of endless options and online reviews, omakase remains appealing precisely because it removes the burden of decision and replaces it with expertise and immediacy. Readers continue to seek it out because the experience feels personal, seasonal and, at its best, quietly theatrical.
Origins and Early Development
The roots of omakase lie in the sushi culture of Edo, the city that became Tokyo. During the late Edo period, particularly the Bunsei years of the early nineteenth century, nigiri sushi was sold from street stalls known as yatai. Portions were small, service was rapid, and the range of fish available changed with the catch. In that busy setting it made practical sense for some customers to leave the sequence of pieces to the chef rather than interrupt conversation with constant ordering.
As sushi moved indoors to permanent counter restaurants in later decades, the practice evolved. Regular patrons who trusted a particular itamae (sushi chef) would simply ask the kitchen to prepare something suitable. One influential figure often linked to formalising the idea is Fujimoto Shigezō, a celebrated twentieth-century chef sometimes called the “Emperor of Sushi.” Over time the phrase omakase, formed from the honorific prefix “o-” and the verb makaseru (to entrust), became the accepted way of signalling that the entire selection and pacing would rest with the chef.
The concept gained wider currency in the late twentieth century. As Japan’s economy expanded, more diners with disposable income entered high-end sushi restaurants. Many lacked detailed knowledge of seasonal fish names or traditional progression. Offering an omakase meal within an agreed budget allowed guests to enjoy premium ingredients without revealing any uncertainty, while chefs could use the freshest available produce without the risk of running short on specific items. By the 1990s the format had become a recognised and sought-after style of dining.
The Experience and Rise to Prominence
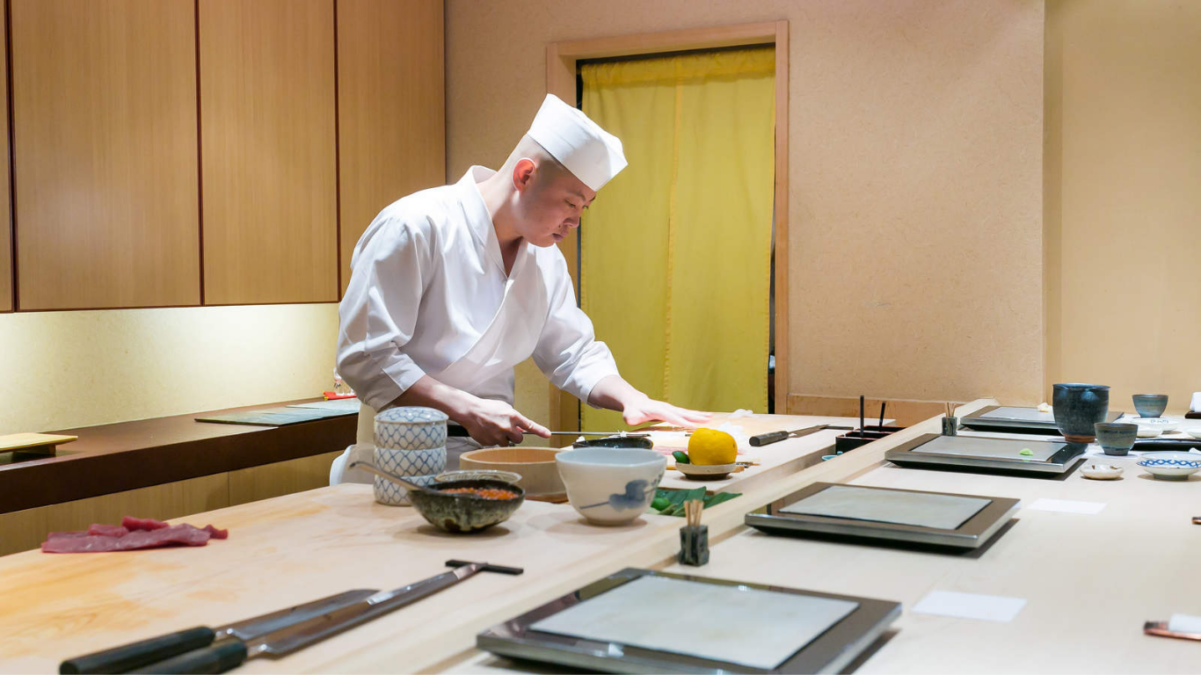
A typical omakase meal unfolds as a series of small courses, often between ten and twenty, served one after another at the counter. The chef works in full view, slicing, seasoning and presenting each piece. The progression usually moves from lighter, more delicate flavours toward richer, more intense ones so that the palate is not overwhelmed early on. Seasonal fish, shellfish, and sometimes lightly cooked or cured items appear according to what the market offers that day.
Interaction forms a key part of the occasion. The chef may announce the name and origin of each ingredient, observe the diner’s reactions, and adjust subsequent courses accordingly. Some establishments pair the food with complementary drinks, though many leave beverage choices open. The Michelin Guide has described the experience as both revered and intimidating, noting its status as a spiritual companion to the more formal multi-course tradition of kaiseki.
Prices vary widely. Accessible options can begin around the equivalent of a few hundred pounds, while the most exclusive counters in major cities may charge several times that amount. The cost reflects not only the quality of seafood but the skill required to age, cure or prepare it at its peak, the limited number of seats, and the personal attention given to each guest.
Important collaborations and public recognition have come through the global spread of Japanese cuisine. Chefs trained in Tokyo or other centres have opened counters in cities around the world, adapting the format while retaining its core principle of trust. In London the scene has grown steadily, with several highly regarded omakase restaurants offering intimate, counter-focused experiences that draw on both Japanese technique and local or carefully imported ingredients.
Challenges and Turning Points
The very qualities that make omakase distinctive also create barriers. High prices and limited seating mean many people encounter it only on special occasions. First-time diners can feel uncertain about etiquette: whether to use chopsticks or fingers for nigiri, how to pace oneself, or how to communicate allergies or preferences without undermining the chef’s control. Reliable sources stress that clear advance notice of dietary needs is both practical and expected.
Misconceptions have arisen as the term travelled. In some places outside Japan, “omakase” is used loosely for any tasting menu, even when a printed list exists and little real-time adjustment occurs. Traditional practitioners emphasise that genuine omakase remains flexible, driven by the day’s produce and the guest’s responses rather than a fixed script. Economic pressures and supply-chain issues for premium seafood have also tested chefs, prompting greater attention to sustainability and alternative sourcing while preserving quality.
Resilience appears in the continued refinement of technique. Chefs experiment with ageing fish, incorporating regional British or European produce where appropriate, and educating diners so that the experience feels welcoming rather than exclusive. The format has survived shifts in fashion precisely because it prioritises skill and seasonality over trends.
Cultural Context and Etiquette
Omakase is not a private matter of relationships or family life in the conventional sense; it is a cultural practice built on mutual respect. Guests are expected to arrive on time, avoid strong perfumes that might interfere with aroma, and remain attentive. Conversation with the chef is welcomed when it feels natural, yet silence during the preparation of a particularly delicate piece is equally acceptable. Many counters prefer that diners eat each item soon after it is placed in front of them so that temperature and texture remain ideal.
Public statements from chefs often underline the responsibility that accompanies the guest’s trust. The meal succeeds when both sides honour that exchange. No reliable public information supports widespread speculation about rigid hierarchies or secret codes; the guiding principle remains practical hospitality grounded in expertise.
Contemporary Practice and Global Reach
Today omakase appears in dedicated sushi counters, broader Japanese restaurants, and even occasional cross-cultural interpretations. In London, establishments such as those in Mayfair and beyond offer experiences that range from classic Edomae-style progression to more inventive sequences. Some chefs import specific rice or water; others highlight the best of local waters while applying Japanese methods of curing and presentation. Charity events, collaborative dinners and educational sessions have further extended the reach of the format.
Business ventures connected to omakase often focus on high-quality supply chains, training for younger chefs, and smaller, more accessible versions of the experience. Advocacy tends to centre on sustainable fishing practices and the preservation of traditional skills. The format continues to evolve without losing its essential character: the diner leaves the decisions to someone who knows the ingredients better than anyone else in the room.
Quick Bio
| Detail | Information |
| Full Name | Omakase (お任せ) |
| Meaning | “I’ll leave it up to you” / chef’s choice |
| Origin | Japanese, rooted in Edo-period sushi culture |
| Primary Association | Sushi and Japanese fine dining |
| Typical Format | Multi-course meal selected and paced by the chef |
| Key Characteristic | Trust, seasonality, counter service |
| Global Spread | Widespread since late 20th century |
| Known For | Personalised, ingredient-driven dining |
Legacy and Lasting Impact
Omakase remains important because it embodies a particular Japanese value: the willingness to entrust an experience to a skilled professional. It has influenced fine dining far beyond sushi bars, encouraging chefs in many cuisines to offer more flexible, chef-driven sequences. Public perception sees it as both an accessible luxury for those who can secure a seat and a demanding test of a chef’s consistency and creativity.
Conclusion
The lasting lesson is simple yet profound. When diners relinquish control, they open themselves to discoveries they might never have ordered. The format rewards curiosity, patience and respect for craft. In return it delivers food that is as current as the morning’s market and as considered as decades of training allow.
Omakase continues to draw people who want more than a meal. They want a conversation conducted through ingredients, timing and quiet attention. That combination of trust and excellence explains why the practice endures and why new generations of chefs and diners keep returning to the counter.
Must Read: Dorothy Bowles Ford: Biography, Family, Career, Net Worth, and More

In the world of spices, few ingredients carry the quiet sophistication of mace. Often overshadowed by its better-known sibling, nutmeg, mace spice remains a favourite among cooks who value subtlety and depth. Derived from the same tropical tree, this golden-orange spice brings a refined warmth to both sweet and savoury dishes, earning its place in kitchens from Indonesia to Europe and beyond.
What keeps readers returning to mace is its dual nature. It is at once familiar and distinctive – a spice that can lift a simple custard or transform a rich curry without dominating the plate. Its story stretches from the remote Banda Islands to the tables of medieval Europe and modern professional kitchens, making it far more than a pantry staple. Understanding mace spice offers a window into centuries of trade, culinary tradition and careful craftsmanship.
Origins and Botanical Background
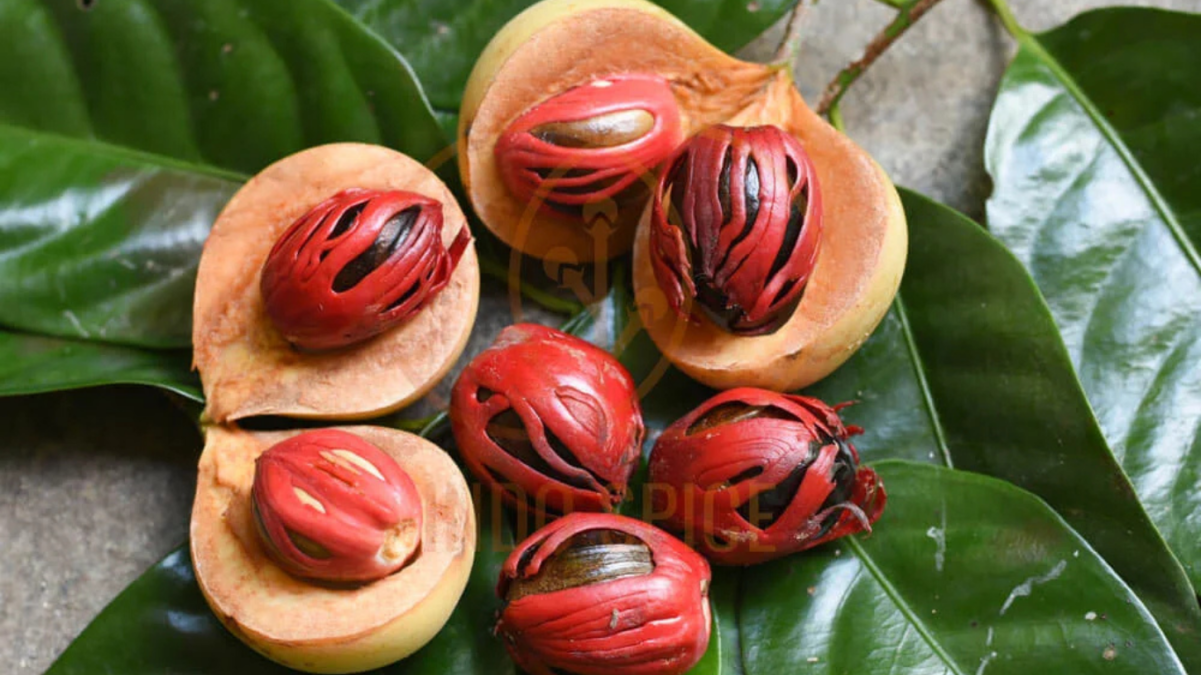
Mace comes from the nutmeg tree, Myristica fragrans, an evergreen native to the Banda Islands in the Maluku archipelago of Indonesia, historically known as the Spice Islands. The tree produces a fruit that resembles a small peach or apricot. When ripe, the fruit splits open to reveal a hard seed – nutmeg – wrapped in a bright red, lacy covering called an aril. That aril is mace.
After harvest, the aril is carefully removed by hand, flattened and dried for ten to fourteen days. During drying it changes from vivid crimson to a pale yellow, orange or tan. The resulting whole pieces are known as blades of mace. These can be used whole or ground into a fine powder. Because each fruit yields only a thin layer of aril, mace is produced in smaller quantities than nutmeg and has traditionally commanded a higher price.
The nutmeg tree thrives in tropical climates with rich volcanic soil and consistent rainfall. Today it is cultivated not only in Indonesia but also in Grenada, Sri Lanka, India, Vietnam and parts of the Caribbean and South America. Grenada, in particular, has made nutmeg and mace part of its national identity; the spice even appears on the country’s flag.
Historical Journey and Rise in Global Cuisine
Mace entered written records relatively late compared with some other spices. Early references appear in Byzantine medical texts of the sixth century, describing a red bark known as macis. Arab traders later carried it westward, protecting their monopoly with stories that kept the true source secret for centuries. By the Middle Ages, mace and nutmeg had become prized in European kitchens and apothecaries. Spices of this rarity signalled wealth; a single pound could cost as much as several fat oxen.
The European quest for direct access to the Spice Islands drove exploration and conflict. Portuguese sailors reached the Moluccas in the early sixteenth century, breaking the Arab hold on the trade. The Dutch East India Company later seized control, establishing a brutal monopoly over the Banda Islands. Wars, forced labour and the deliberate destruction of trees outside Dutch control marked this period. Only in the nineteenth century, when French and British planters successfully transplanted the trees to other tropical regions, did the monopoly finally collapse.
Despite its turbulent history, mace found a firm place in culinary traditions. It became a key ingredient in medieval European sauces, meat dishes and preserved foods. In Indian cuisine it forms part of garam masala and appears in biryanis and rich curries. Middle Eastern cooks use it in stews and pastries, while French chefs have long favoured it in custards, crème brûlée and light sauces where nutmeg might prove too forceful.
Challenges and Turning Points
The very scarcity that made mace valuable also created difficulties. Because the aril is thin and fragile, harvesting and drying require care. Improper drying can lead to mould or loss of aroma. In the colonial era, control of production meant violence and exploitation; the Banda Islands suffered population decline and environmental damage under Dutch rule.
Even after the monopoly ended, producers faced new pressures. Hurricanes in the Caribbean, particularly in Grenada, have repeatedly damaged crops. Modern challenges include maintaining quality standards, avoiding contamination and competing in a global market that demands consistency. Smallholder farmers, who still grow much of the world’s supply, must balance traditional methods with the requirements of international buyers.
Yet resilience has characterised the spice’s story. The spread of cultivation beyond Indonesia ensured supply, while careful grading systems – such as Grenada’s Fancy grade – help maintain reputation. Today’s focus on sustainable and ethical sourcing offers a quieter but important turning point, linking contemporary producers with consumers who value origin and quality.
Flavour Profile and Culinary Character
Mace offers a more delicate profile than nutmeg. It carries warm, woody notes with hints of citrus, clove, pepper and a subtle floral quality. The finish is slightly bitter and aromatic rather than heavily sweet. Many describe it as lighter and brighter than nutmeg, making it especially suited to dishes where a strong nutty note would overwhelm.
Whole blades release flavour slowly and suit long-cooked dishes such as stews, soups and braises. Ground mace is convenient for baking, spice blends and finishing sauces. Because it is potent, a little goes a long way; recipes often call for only a pinch or a single blade.
It pairs naturally with cinnamon, cloves, cardamom, ginger and black pepper. In sweet applications it enhances apple pies, custards, rice puddings and fruit cakes. In savoury cooking it lifts white sauces, fish dishes, poultry, lentils and vegetable sides. British and Scandinavian cooks have long used it in sausages and pickled foods, while Caribbean and Indian kitchens rely on its warmth in meat and rice preparations.
Modern Production and Everyday Uses
Indonesia remains the leading producer of mace, followed by significant contributions from India, Sri Lanka and Grenada. The spice reaches markets as whole blades or ground powder. Europe is a major importer, with Germany and the Netherlands playing key roles in distribution and re-export. Demand comes from both home cooks and the food industry, where mace appears in processed meats, baked goods, sauces and spice mixes.
In contemporary kitchens, mace continues to find new roles. Chefs value its ability to season pale sauces without darkening them. Home cooks add it to mulled wine, chai, roasted vegetables and even coffee. Its traditional use in preserving and pickling remains relevant, and small amounts appear in some commercial spice blends and ready meals.
While research explores potential antioxidant and digestive properties linked to compounds in Myristica fragrans, culinary use remains the primary and safest application. As with most spices, moderation is key; large medicinal doses have historically been associated with unwanted effects and are not recommended.
Quick Facts
| Detail | Information |
| Botanical Name | Myristica fragrans |
| Part Used | Dried aril (seed covering) of the nutmeg fruit |
| Common Forms | Whole blades, ground powder |
| Native Region | Banda Islands, Indonesia |
| Main Producing Countries | Indonesia, India, Sri Lanka, Grenada, Vietnam |
| Flavour Profile | Warm, woody, citrusy, floral, mildly peppery |
| Primary Culinary Uses | Baking, sauces, stews, spice blends, preserving |
| Related Spice | Nutmeg (the seed of the same fruit) |
Legacy and Lasting Impact
Mace spice endures because it occupies a distinctive place in the spice spectrum. It offers the comfort of nutmeg without the same intensity, allowing cooks greater control over flavour. Its history connects remote tropical islands with European courts, colonial ambition and the everyday pleasure of a well-seasoned dish.
In professional and home kitchens alike, mace is valued for precision. A single blade can perfume a pot of soup; a light dusting can elevate a custard. Public perception has shifted from rare luxury to accessible pantry item, yet its reputation for quality and subtlety remains intact. The lesson of its journey is one of adaptation: a spice that survived monopoly, conflict and changing tastes continues to enrich global cooking.
Conclusion
From the lacy red aril of a tropical fruit to the quiet warmth in a finished dish, mace spice has travelled a long and eventful path. Its story reflects the broader history of the spice trade while remaining firmly rooted in practical cooking. Whether used in a classic British baked pudding, an Indian biryani or a modern vegetable soup, it rewards careful handling and thoughtful pairing.
Must Read: Magfusehub Com: Exploring a Growing Multi-Niche Digital Content Hub

Dave Calhoun and Gautam Adani: The Human Stories Behind Two Titans Who Faced the Storm

Who Was Nolan Pentz Martinez Father? The Quiet Man Behind a Musical Legacy

Who Is Glena Goranson? The Quiet Strength and Heartfelt Story Behind Pete Carroll’s Life


 Technology2 months ago
Zingyzon.com in USA: Your Practical Guide to Smarter Home Living
- Technology2 months ago
Exploring Glaadvoice.com: An Independent Voice in Digital Media
- Fashion2 months ago
Home Decor Ideas TheHomeTrotters: Timeless Inspiration for Creating a Home You Love
- Technology2 months ago
Yonosamachar Com: Exploring the Rise of a Digital News Platform in the Modern Information Age
- Celebrity1 month ago
Tanner Wiseman Net Worth 2026: Age, Career, Family and Biography
- Celebrity2 months ago
Nancy Guthrie Update: Suspect Search and Ongoing Investigation into the Disappearance of Savannah Guthrie’s Mother
- Celebrity2 months ago
Jesse Belle Deutschendorf: The Private Artistic Life of John Denver’s Daughter
- Fashion2 months ago
Gelato Pique: The Japanese Brand Turning Loungewear into Wearable Dessert